Home » Course lessons » Send Notifications when Someone Submits the Form in WordPress
Send Notifications when Someone Submits the Form in WordPress
Toolset's front-end forms include a comprehensive email notifications system. When someone submits a form, it can send notifications to both clients and site admins.
When editing a Toolset form, look in the E-mail Notification section. You can create several notifications for the same form. Each notification has:
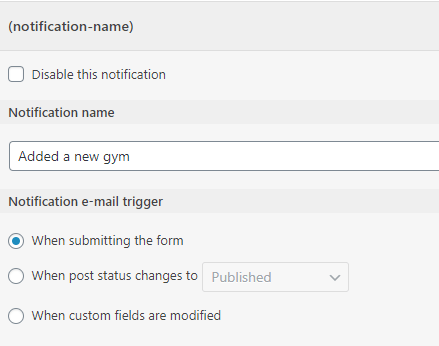
A name – to easily identify a notification
An option to enable or disable the notification
An event – when to send the notification
Email destination and source – who receives the notification and who sends it
Subject
Body
Notify when submitting a form
Email notifications work just the same for forms for submitting content or registering users.
When visitors submit a form, Toolset can send a notification email. It’s usually a good idea to send an email to the site admin and to the visitor (different notifications for each).
Setting up notifications
In the When to send this notification section, select When submitting the form.
Selecting when to send the notification for a form for submitting new content
Toolset Forms Commerce note: if you have payments enabled for this form, the notification option changes to notify when going to payment.
Send different notifications to the site admin and visitor
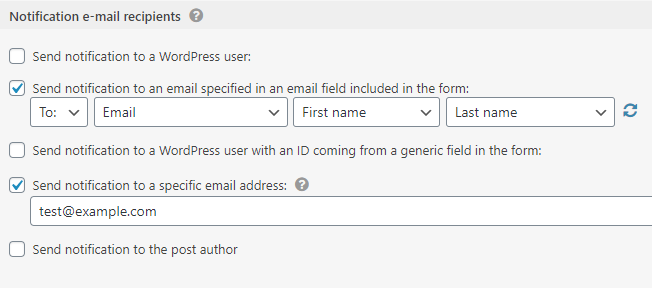
Toolset lets you specify multiple recipients for the same notification email. All recipients will receive the same email and can see each other (except if you select them as BCC).
Selecting who should get the notification
Toolset Forms Commerce note: you will see another option to Send this notification to the billing email.
Normally, you would want to send two different notifications, with different content, to the site admin and the visitor who submitted the form.
The admin notification would tell that there is something new to review. The visitor notification would be a confirmation that their content was submitted or account created and any additional information.
To send different notification emails, you should add new notifications and set each of their destination and content separately. You can create several notifications for the same event.
You can display dynamic fields in notifications for both Post and User forms.
For example, when a user registers using a Toolset form, notification can display their information. This could be a standard field like a username, or custom user fields you created using Toolset.
Also, when users submit a new post using a Toolset form, you might have notifications scheduled to be sent later and not only when submitting the form. These notifications can display information about the submitted post. This could be a standard field like the post title, or custom fields you created using Toolset.
In both these cases, you can use the Fields and Views button to insert shortcodes that display post and user fields. However, you must also manually add an additional attribute so the notification knows the exact ID of a post or user in question.
Displaying User Information in Notifications
First, you need to insert the shortcode for displaying user information:
In the Notification e-mail subject editor, click the Fields and Views button.
Find the user field you want to display and click to insert it.
In the User selection pop-up dialog that appears, select Author of the current post and click Insert shortcode.
So, for example, if we inserted a custom user field called “Date Of Birth”, the following shortcode will be inserted:
However, to display a custom user field for the user that just got registered by the form, we need to manually add an additional user_id="%%USER_USERID%%" argument, like this:
Displaying Post Information in Notifications
First, you need to insert the shortcode for displaying post information:
In the Notification e-mail subject editor, click the Fields and Views button.
Find the post field you want to display and click to insert it.
Check out the additional options and click Insert shortcode.
So, for example, if we clicked to insert a post title with a link, the following shortcode will be inserted:
However, to display this information for the correct post, we need to manually add an additional item="%%POST_ID%%" argument, like this: