- New Feature: Compatibility support for Bootstrap markup and styling of newly crated CRED forms.
- Moving the option to add edit-form links to Views Plugin.
- Fixed an issue where CRED front-end script conflicted with some Knockout.js scripts.
- Fixed an issue with urlparam attribute not working for CRED form fields.
- Fixed an issue with broken user interface of the Expiration Date calendar.
- Fixed an issue with CRED forms not appearing for guests when Toolset Access is active.
- Fixed an issue with CRED button not working inside a Divi Text Module.
- Fixed an issue with taxonomy field not retaining value after failed validation.
- Fixed an issue with Post Expiration Date randomly changing when updating the post from backend.
- Fixed an issue with form IDs always ending with 0, causing styling issues.
- Fixed an issue with fields not auto-filling with ‘value’ attribute value.
- Fixed an issue with post expiration throwing fatal error with certain timezone values.
- Fixed an issue with failing XML import.
- Fixed an issue where taxonomy add button was always showing.
- Fixed an issue with user forms supposedly redirecting to an user after being submitted.
CRED 1.9 brings great looking form elements out-of-the-box. It also brings an improved workflow for displaying editing forms and an automatic grid generator in the form editor.
Form fields look nice out-of-the-box
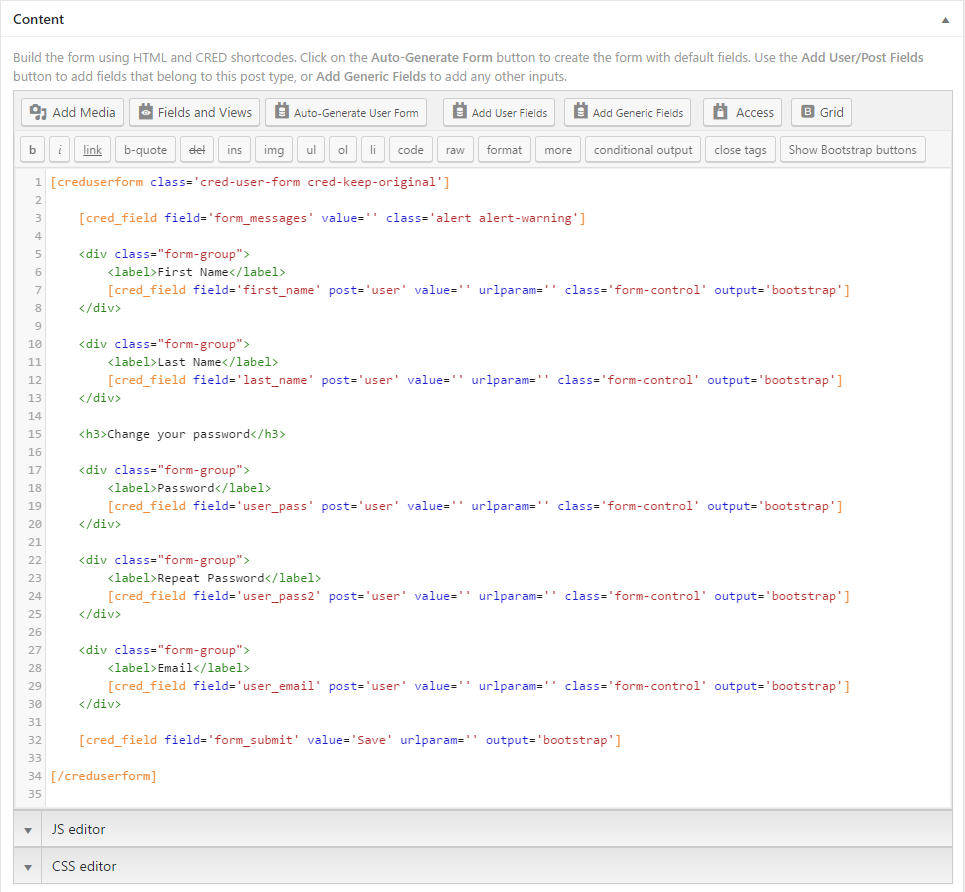
The biggest change in CRED is the way how forms are auto-generated. All fields are generated with a new output attribute and the value “bootstrap”. This makes the fields render with Bootstrap-compatible HTML markup and CSS classes on the front-end.
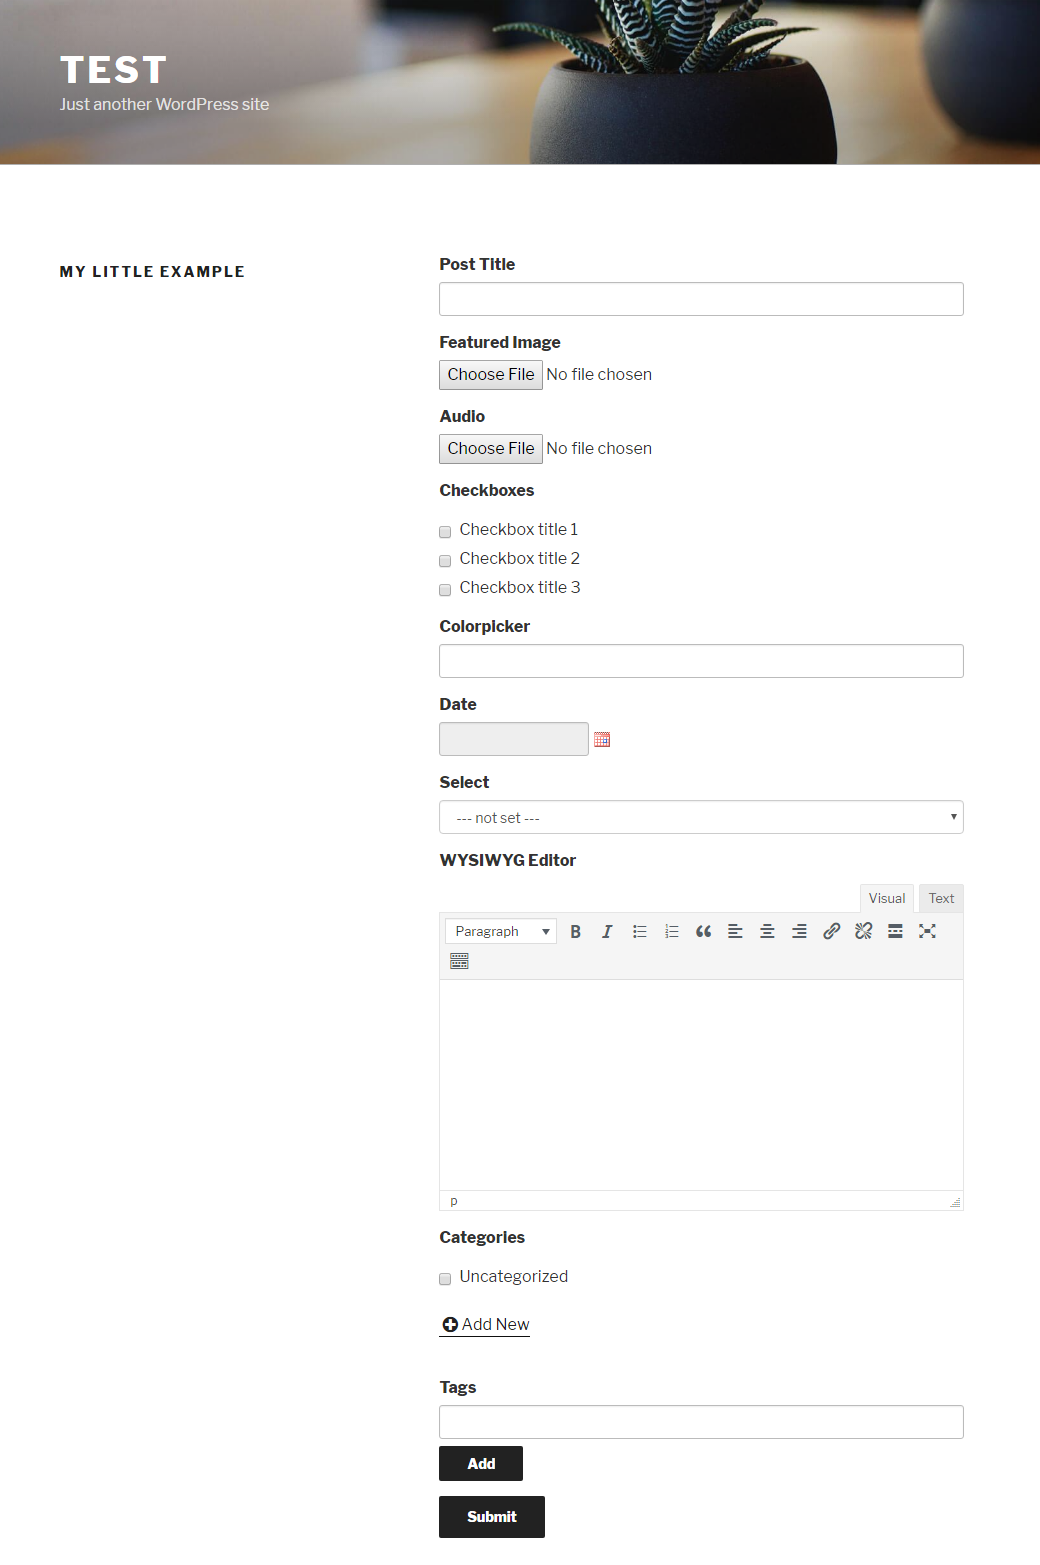
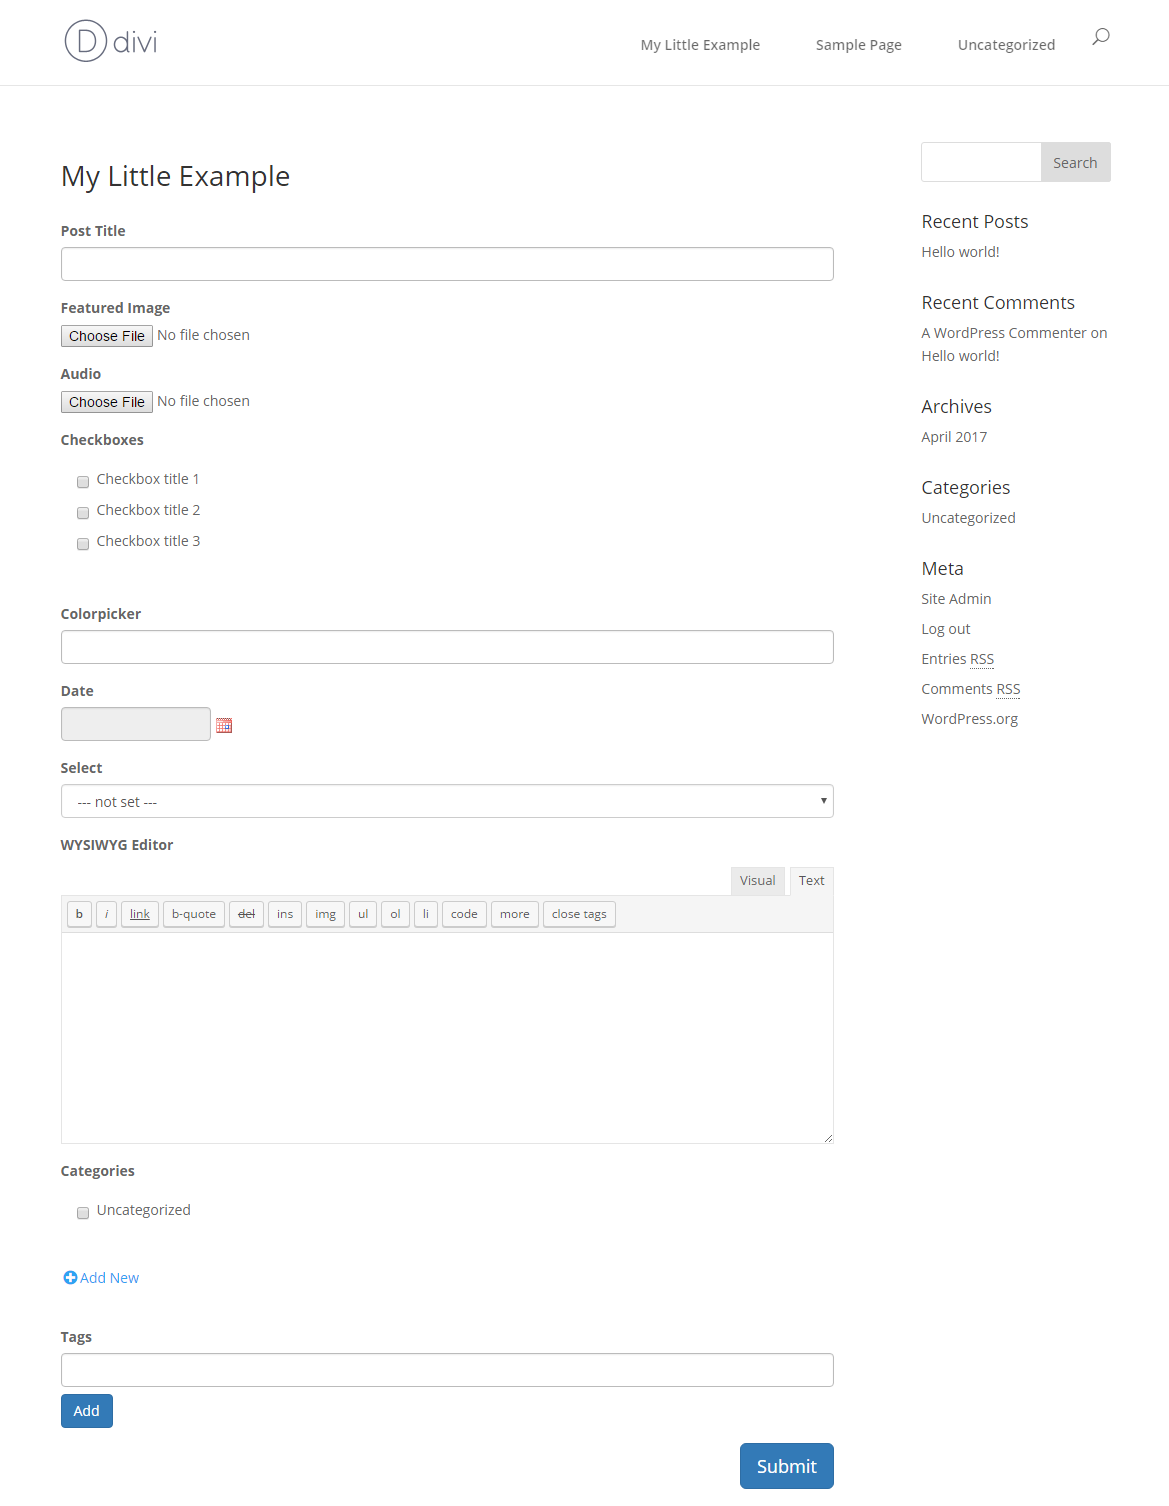
Let’s see how a CRED form with all the standard fields looks like on the front-end, with some popular themes.
| Twenty Seventeen | Divi | Genesis (with a Benson child theme) |
|---|---|---|
 |
 |
 |
What about existing sites and forms?
The new CRED version is, naturally, completely backwards compatible, which means that after updating to this version, the existing sites and forms will be output the same as before.
This is provided by the new setting called Load CRED Legacy style sheets on front-end, which is automatically checked for users upgrading the existing CRED installation. This option is unchecked for users with new installations.
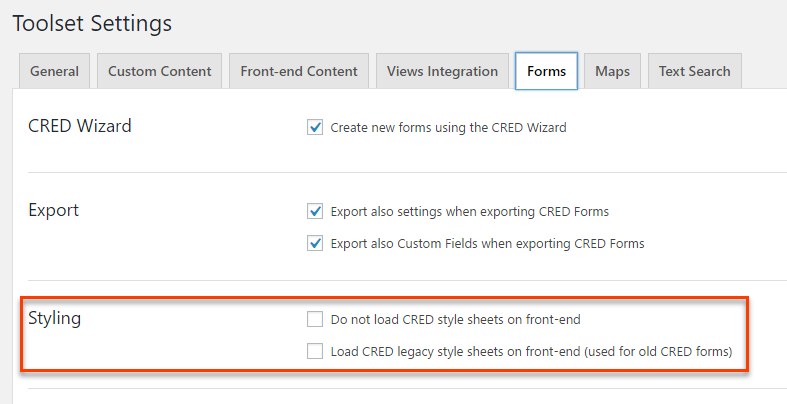
As you can see, you now also have the Do not load CRED style sheets on front-end option. When this option is selected, no CRED stylesheet is loaded on the front-end, neither the new or the legacy one.
Finally, we removed the Use bootstrap option so from now on CRED will always use Bootstrap markup when creating new forms.
Grid generator to easily arrange form elements into columns
So far, whenever you wanted to position the elements inside your CRED forms and Views, you had to resort to creating custom HTML structure and CSS styling.
We wanted to help and simplify this, which is why we added the option that allows you to easily generate Grid rows based on Bootstrap. Again, we chose Bootstrap because of its clean output and the fact that it works great with virtually any theme and setup.
No more need to bother writing custom div tags that you need to float, clear and whatnot. Simply click the Grid button, select a pre-defined grid structure and click to insert it.
Here is a short clip that shows how to add columns to a CRED form, with the new Grid tool.
New workflow for displaying CRED editing forms
During this development cycle, we found some glitches and usability issues with how CRED editing forms worked. This is why we made some important changes and improvements to how you display CRED editing forms on your site.
The biggest change is in how editing forms work. Previously, CRED would attempt to automatically replace the “post content” with a form. Now, we allow you to create separate templates for display and editing modes.
The new workflow for displaying CRED editing forms is:
- Create a separate template (either a Layout or a Content Template) that you want to use when editing the content (editing-mode template)
- The new “editing-mode” template will include the CRED editing form. If you want, you can include other things in it, but usually the CRED edit form is all you need.
- Insert links to editing mode where you need them. This can be in a single-item template to “edit this”, or in Views to edit items in the list.
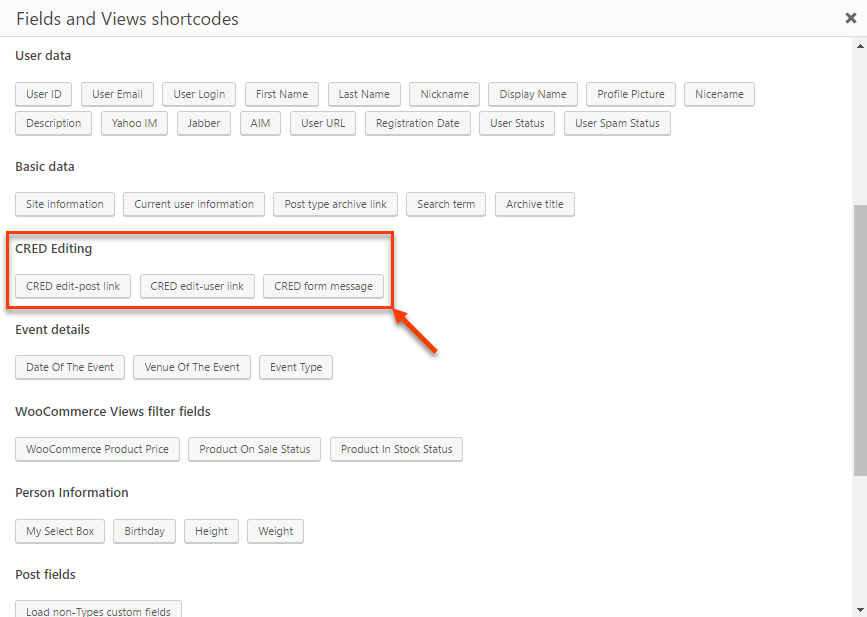
For this purpose, you will now find three new shortcodes in the Fields and Views dialogs. Two for inserting the links to CRED editing forms and one for displaying a CRED success message. The message shortcode needs to be added to the templates for displaying single posts.
Bugfixes
Width of fields in CRED forms
There was a bug in the previous versions of CRED stylesheets, which prevented certain form fields from extending to full width of the container, by default. The fields in question were select, standard text field, and textarea.
We fixed this bug and now, by default, all form fields extend to the full width of their respective container.